-
The minimum case material that the board should have when being played or programmed is the top panel. After you sodder on the sliders use bolts (provided) to secure the top panel (provided for Advanced CS1) onto the board. Then when you are using the board hold it by the top laser cut panel, not by the board.
-
This version (and all versions) are best used with a full case and horn (see the case folder and the horn folder ) for ergonomics and sound quality, though the case and horn are not necessary for basic use.
-
The circuit will not work properly if the battery is depleted (see battery section below). If you have been using the same battery for a while or the circuit is acting like it is low on battery (see battery section below), then follow the instructions in the battery section of this readme to measure how much battery is left. In future versions there will be an onboard battery sensor you can access in your code.
-
The board behaves like an Arduino Micro. See the "Programming" section below.
-
When programming the slider to control the volume of the speaker, map your analog reading from 0-1000 to 0-10. If you use 0-1023 the full volume tones will sound distorted because it will flicker between volume level 9 and 10.
-
See the example code section of this readme on how to conduct the board calibration.
-
See the expanded documentation for more information on the board as well as expanded procedures and notes.
TrinTheremin, like the Sparkfun Digital Sandboxes used in CS1/CS2, is an all in one programmable circuit that allows the user to process/control different inputs/outputs on the board. Its ATMEGA microcontroller chip has its own CPU (central processing unit; the brain of the device), flash memory (where your program is stored), SRAM (where the sketch creates and manipulates variables while running), and EEPROM (NON-VOLATILE storage space programmers can access/use; EEPROM will keep its stored data even without electrical power (when the unit is off), as opposed to volatile memory (like SRAM) that would lose its data without electrical power). While you probably won't need to use any EEPROM for this project (although feel free to do so if you have a use for it), you will constantly be using the CPU and SRAM, as well as the flash memory (where your program lives). See this chart for how much memory the microcontroller on the TrinTheremin (the ATMEGA 32u4) has of each main type (there are other memory types onboard that I won't go into):
| Memory Type: | Amount of storage (bytes): |
|---|---|
| Flash | 32000 |
| SRAM | 2500 |
| EEPROM | 1000 |
The flash is not all available, however, as the board's "bootloader" (the software that allows you to upload Arduino code) takes up about 4kB, or 4000 bytes, leaving about 28kB usable for storing code. The bootloader is already installed on all the boards.
Beyond the chip (and its dedicated hardware such as its crystal and resistors and capacitors), all the circuits on this board should be pretty familiar (with the exception of the speaker's circuit). See the circuit design pictures folder. On the left side of the schematic is all the dedicated Arduino hardware, however the right side shows the circuits for all the peripherals (the buttons, switch, light sensor, LEDs, etc). Take a look at the right side to see how simple (and common) the circuits behind the peripherals are. The circuit for for the switch, for instance, just includes the switch and a pulldown resistor (which keeps the voltage at 0V unless the switch is closed to 5V) and is connected to a digital pin (D12):
/LowerRight.jpg)
The TrinTheremin was purpose built for Trinity's CS2 and Advanced CS1 programs (specifically the physical computing and digital logic units, respectively), although it could be used in a wide variety of applications that use inputs and outputs involving sound and light.
The TrinTheremin's battery should be connected to the 9v battery connector on the bottom of the board and stored in the clip under the slider (also on the bottom of the board).
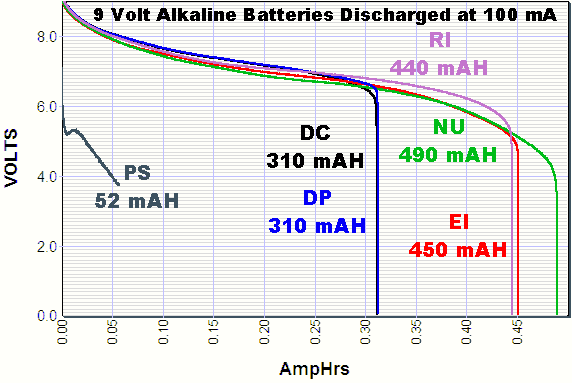
Like any device, the TrinTheremin will eventually run out of battery. Trinity's collection of Apex batteries have a 595mAh capacity. Milliamp hours (mAh) are a unit of electrical charge (one milliamp hour is about 3.6 coulombs, a unit commonly taught in Trinity physics that is generally used when working with static electricity rather than circuits). This means that the batteries can supply 595 mA of current for one hour. The TrinTheremin draws about 400 mA when the speaker is on at full volume so at minimum the TrinTheremin will run for about 1.5 hours (with everything running and its speaker on at full volume) continuously. If you do not have the speaker on the device draws only about 25 mA, which will yield about a day of continuous use (so do not feel the need to turn off the device while programming it as having it on does not use up much battery life) To more accurately determine how much battery life the device has left (and without keeping track of how much time you have used it for), you can measure the remaining battery life with a multimeter (located in the top drawer in the drawers by the door in the computer science lab -- ask Mr. Rose or Mr. Gohde if you are unsure where this is) and a few quick calculations.
First, set the multimeter to measure DC voltage and make sure the leads are connected to the right ports (red to positive (+) and black to negative (-, sometimes referred to as COM) -- see this tutorial on multimeters. Then measure the voltage of the battery (touching the red lead of the multimeter to the positive terminal of the battery (marked by the + symbol on the battery) and the black lead to the negative terminal (marked by the -). Here is a chart that shows the battery life estimates for an alkaline cell:
| Alkaline Voltage Level and Range (V): | Usability: |
|---|---|
| 1.50 | New and unused |
| 1.35 – 1.49 | Good |
| 1.20 – 1.34 | Average |
| 1.10 – 1.19 | Low |
| 0.90 – 1.09 | Very Low |
| < 0.90 | Dead – Discard! |
Given that alkaline 9v batteries (Trinity's Apex 9v batteries are alkaline) are 6 alkaline cells, we can multiply through these ranges to find voltages that apply to the reading from the 9v battery:
| 9v Battery Voltage Level and Range (V): | Usability: |
|---|---|
| 9 | New and unused |
| 8.1 – 8.94 | Good |
| 7.2 – 8.04 | Average |
| 6.6 – 7.14 | Low (Unusuable below about 6.75v) |
| 5.4 – 6.54 | Very Low (Unusable) |
| < 5.4 | Dead – Discard! (Unusable) |
There is one more factor to consider, though, and that is that the TrinTheremin needs about 6.75v to run properly. This is because the voltage regulator (a chip on the board that takes the voltage being supplied by the battery and regulates it at a constant 5v for the circuit to use) needs at least 6.75v to be able to output 5v as its supposed to. This extra 1.75 volts it needs is called the "dropout voltage" -- this chart from the chip's datasheet was how I found that the dropout voltage is 1.75 volts (assuming 25C temperature and 500mA current draw):
If the board is acting weird or blatantly executing programming commands incorrectly (that's not because of mistakes in the code) it is almost certainly because its does not have the necessary voltage (so measure it and replace the battery if necessary). There is a small range of voltages where the board will turn on but may work improperly.
The TrinTheremin has the same chip as an Arduino Micro, so it will behave almost identically to that board. Important caveats to note:
-
When using Serial (rx/tx) on the "COM breakout" you must use Serial1 instead of Serial. Since this chip has its own embedded usb circuit, Serial.print will print to the Arduino console as usual, however Serial1 will reference the hardware serial ports (rx/tx). So you would use Serial1.begin(9600), Serial1.print("text"), etc to use the HARDWARE serial. On an Arduino Uno, for example, which has an external USB circuit that is connected inline with the hardware serial ports, the Serial command references both the hardware and the usb serial (so Serial.print will output serial on the tx port but also print to the Arduino developer's console)
-
Because the chip has built in USB, when you plug it into your computer it will be recognized as a mouse or keyboard (and you can actually use it as such -- more on that here).
-
When you upload your code, select "Arduino Micro" under boards, and the appropriate port under ports.
-
When programming the slider to control the volume of the speaker, map your analog reading from 0-1000 to 0-10. If you use 0-1023 the full volume tones will sound distorted because it will flicker between volume level 9 and 10.
-
The calibration procedure in the example code is this: i. When one LED is blinking do not cover the sensor at all -- it is measuring the ambient light levels; ii. Once the speaker makes a noise and the LED stops blinking cover the sensor with your hand iii. Once both LEDs stop blinking and then light up in a pattern the calibration process is complete
-
The autoplay feature can work very well if you put your hand over the dancing LED and the sensor. It will work fine if you leave it in ambient light, but the more ambient light there is, the worse it will work (this cannot be fixed in calibration -- think about it like the LED's light is getting drowned out).
-
The toneAc library is used to control the speaker. To download toneAc see this link. Here is the toneAc reference.
If any future versions of the TrinTheremin are produced these are some of the goals that did not get included in this initial version:
-
A more efficient amplifier -- the amplifier circuit on the TrinTheremin right now is very simple to use and understand (both in software and in hardware), works with the ToneAC library, and has pretty good quality sound (meeting the goals of the board). However in future versions a more sophisticated amplifier circuit might be combined with a possible TrinTheremin Arduino library to keep the software simplicity of ToneAC while improving quality and GREATLY improving efficiency (battery life would be improved immensely).
-
A voltage divider circuit -- this is one of the easiest (and also most helpful) changes that could be introduced in future versions. Essentially this would take the voltage of the battery, divide it in two (9v becomes 4.5, 7 becomes 3.5, etc), and feed it to an analog input (0v-5v yields a 0-1023 reading) on the microcontroller. This would allow the programmer to measure the voltage of the battery. With this they could create an integrated battery life check that would alert the user if the battery were low.
-
Headphone jack -- a headphone jack could be added to the board in addition to the speaker so the user could play with headphones on. The port would have a switch in it that would be conencted to a digital pin so the programmer could automatically turn off the speaker when headphones are plugged in.
-
Reduced cost -- right now the TrinTheremin costs about 25$ per board to produce, however with hardware changes and different production methods, this could potentially be significantly reduced. For reference an Arduino Micro costs about 22$ (with no inputs or outputs built in)
-
Expanded documentation and a more seamless user interface -- maybe a website? -- Right now trintherem.in redirects to this github repository, however in the future a website dedicated to the TrinTheremin could be produced.