Setup SGDK with CodeBlocks
Here's how to use SGDK within Code::Blocks IDE
- Download Code::Blocks and install it ( http://www.codeblocks.org/ )
- Launch Code::Blocks and go to the Setting --> Compiler and debugger menu

- Create a new compiler configuration by doing a copy of the basic GNU GCC Compiler. Name it as you want ("Sega Genesis Compiler" here).

- Toolchain executables tab, enter the SGDK path in the Compiler's installation directory. Unfortunately it does not accept variable name so you have to enter it to its own. Then set the executable filename as on the picture:
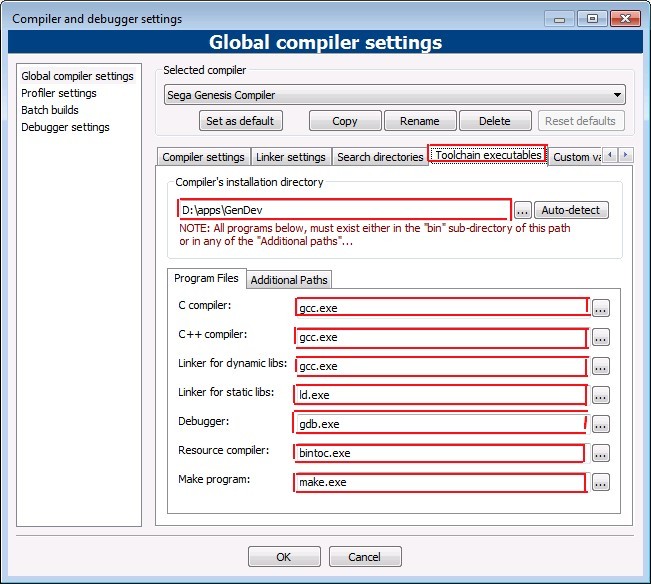
At this point we already finished the compiler configuration :)
Now here's how to do your own project and compile it:
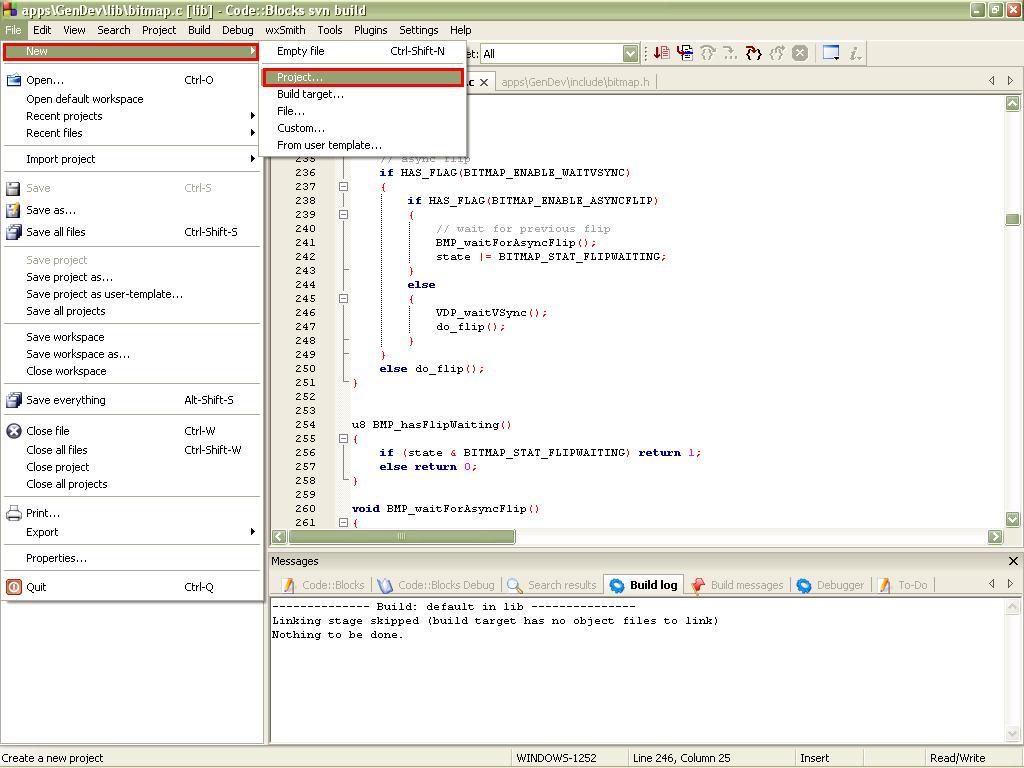
- Do a new project
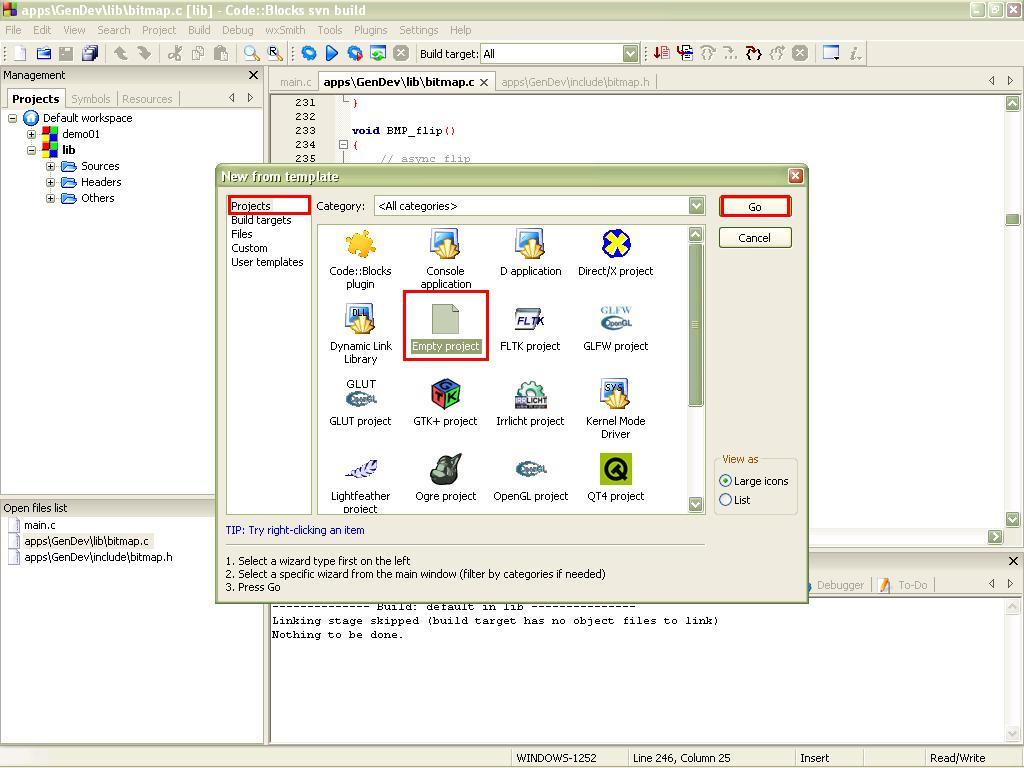
- Choose a empty project type and click on "Go" button
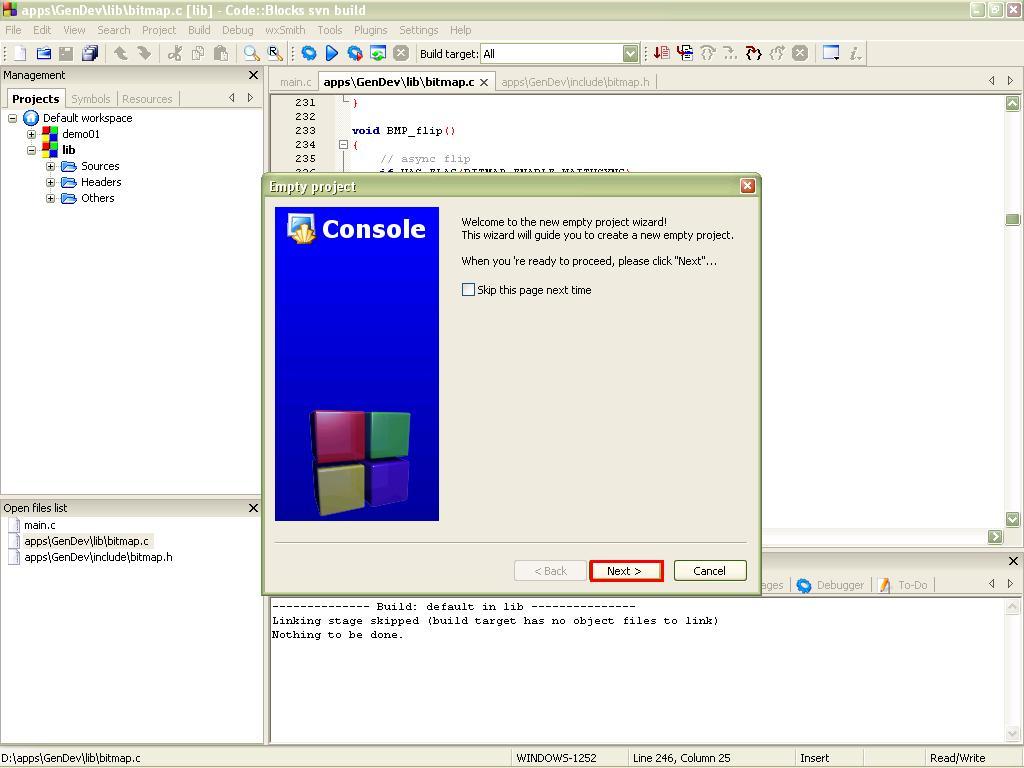
- Click on Next...
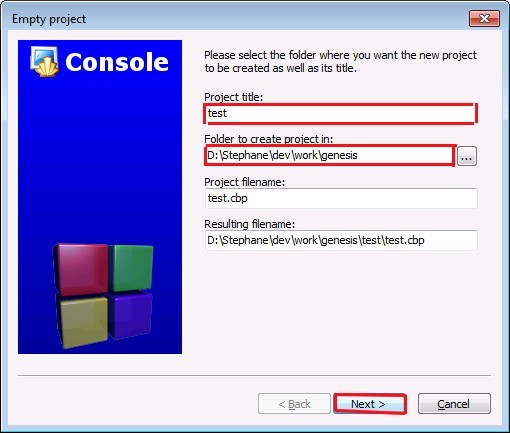
- Choose a name and a directory for your project, others box are automatically filled but you can modify them if you want, then click on Next.
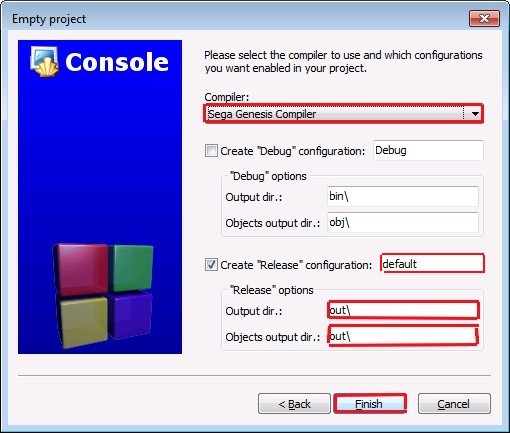
- Choose the genesis compiler you just set up (Sega Genesis Compiler here). Uncheck the Debug configuration which is useless here and rename the Release configuration to default as this is the only used here. Change the outputs directory to "out" then click on finish.
- Open the contextual menu on the project and choose Properties...

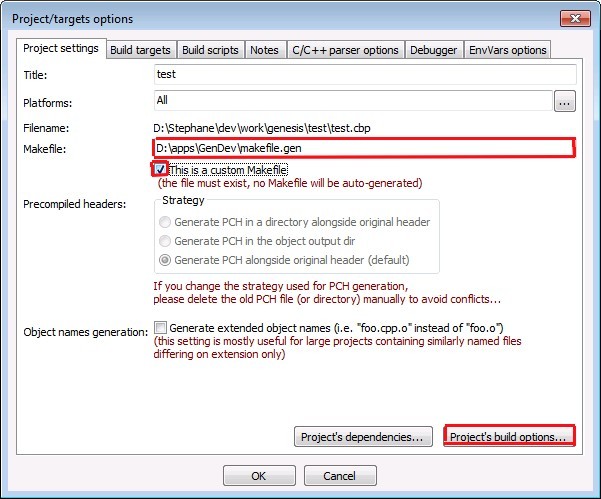
- Use the provided makefile.gen file in SGDK as the project makefile. Don't forget to check the This is a custom Makefile checkbox. Then click to the Project's build options button.
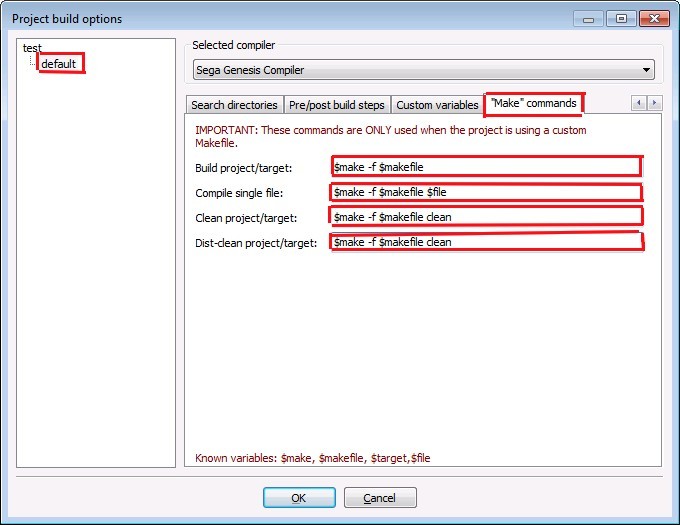
- Select the default configuration in left column, check if the Selected compiler is the good one (Sega Genesis Compiler here) and go to the last tab Make. Then modify the make commands as here:
- Validate your changes and now you can add files to your project, your files should be localized in your project directory as following:
- Source files (C, S): root directory or src directory
- Include files (H, INC): root directory or inc directory
- Resource files (RES): root directory or res directory
- Compile your project in the Build menu, Build command or press Ctrl+F9 keys. If all is correctly setup you should obtain a rom.bin file in the out directory of your project directory :)