TasmoHAB is a Python program with GUI which can read Tasmota devices and automatically integrate and configure them in OpenHab by TXT files or by REST API.
Note
Please check the template and adapt it to your own OpenHab if necessary (f.e.:'set mqttUID'). Also check 'tasmohab.cfg' for following parameters:
Openhab_Instances
OpenHab_User
OpenHab_Pass
Thing_Path
Item_Path
and so on ...
- metadata api (set metadata via API, txt files should work)
- Readout of Tasmota devices
- Inspect settings of tasmota devices
- Display, edit and save tasmota rules
- change tasmota settings
- usage of tasmota backlog command
- possibility to create and save a device config from any tasmota device and load it later on
- display all components of the tasmota device
- name, configure and create openhab things and items and linke them
- create things,items and links via text-based files (.items or .things) or via REST API
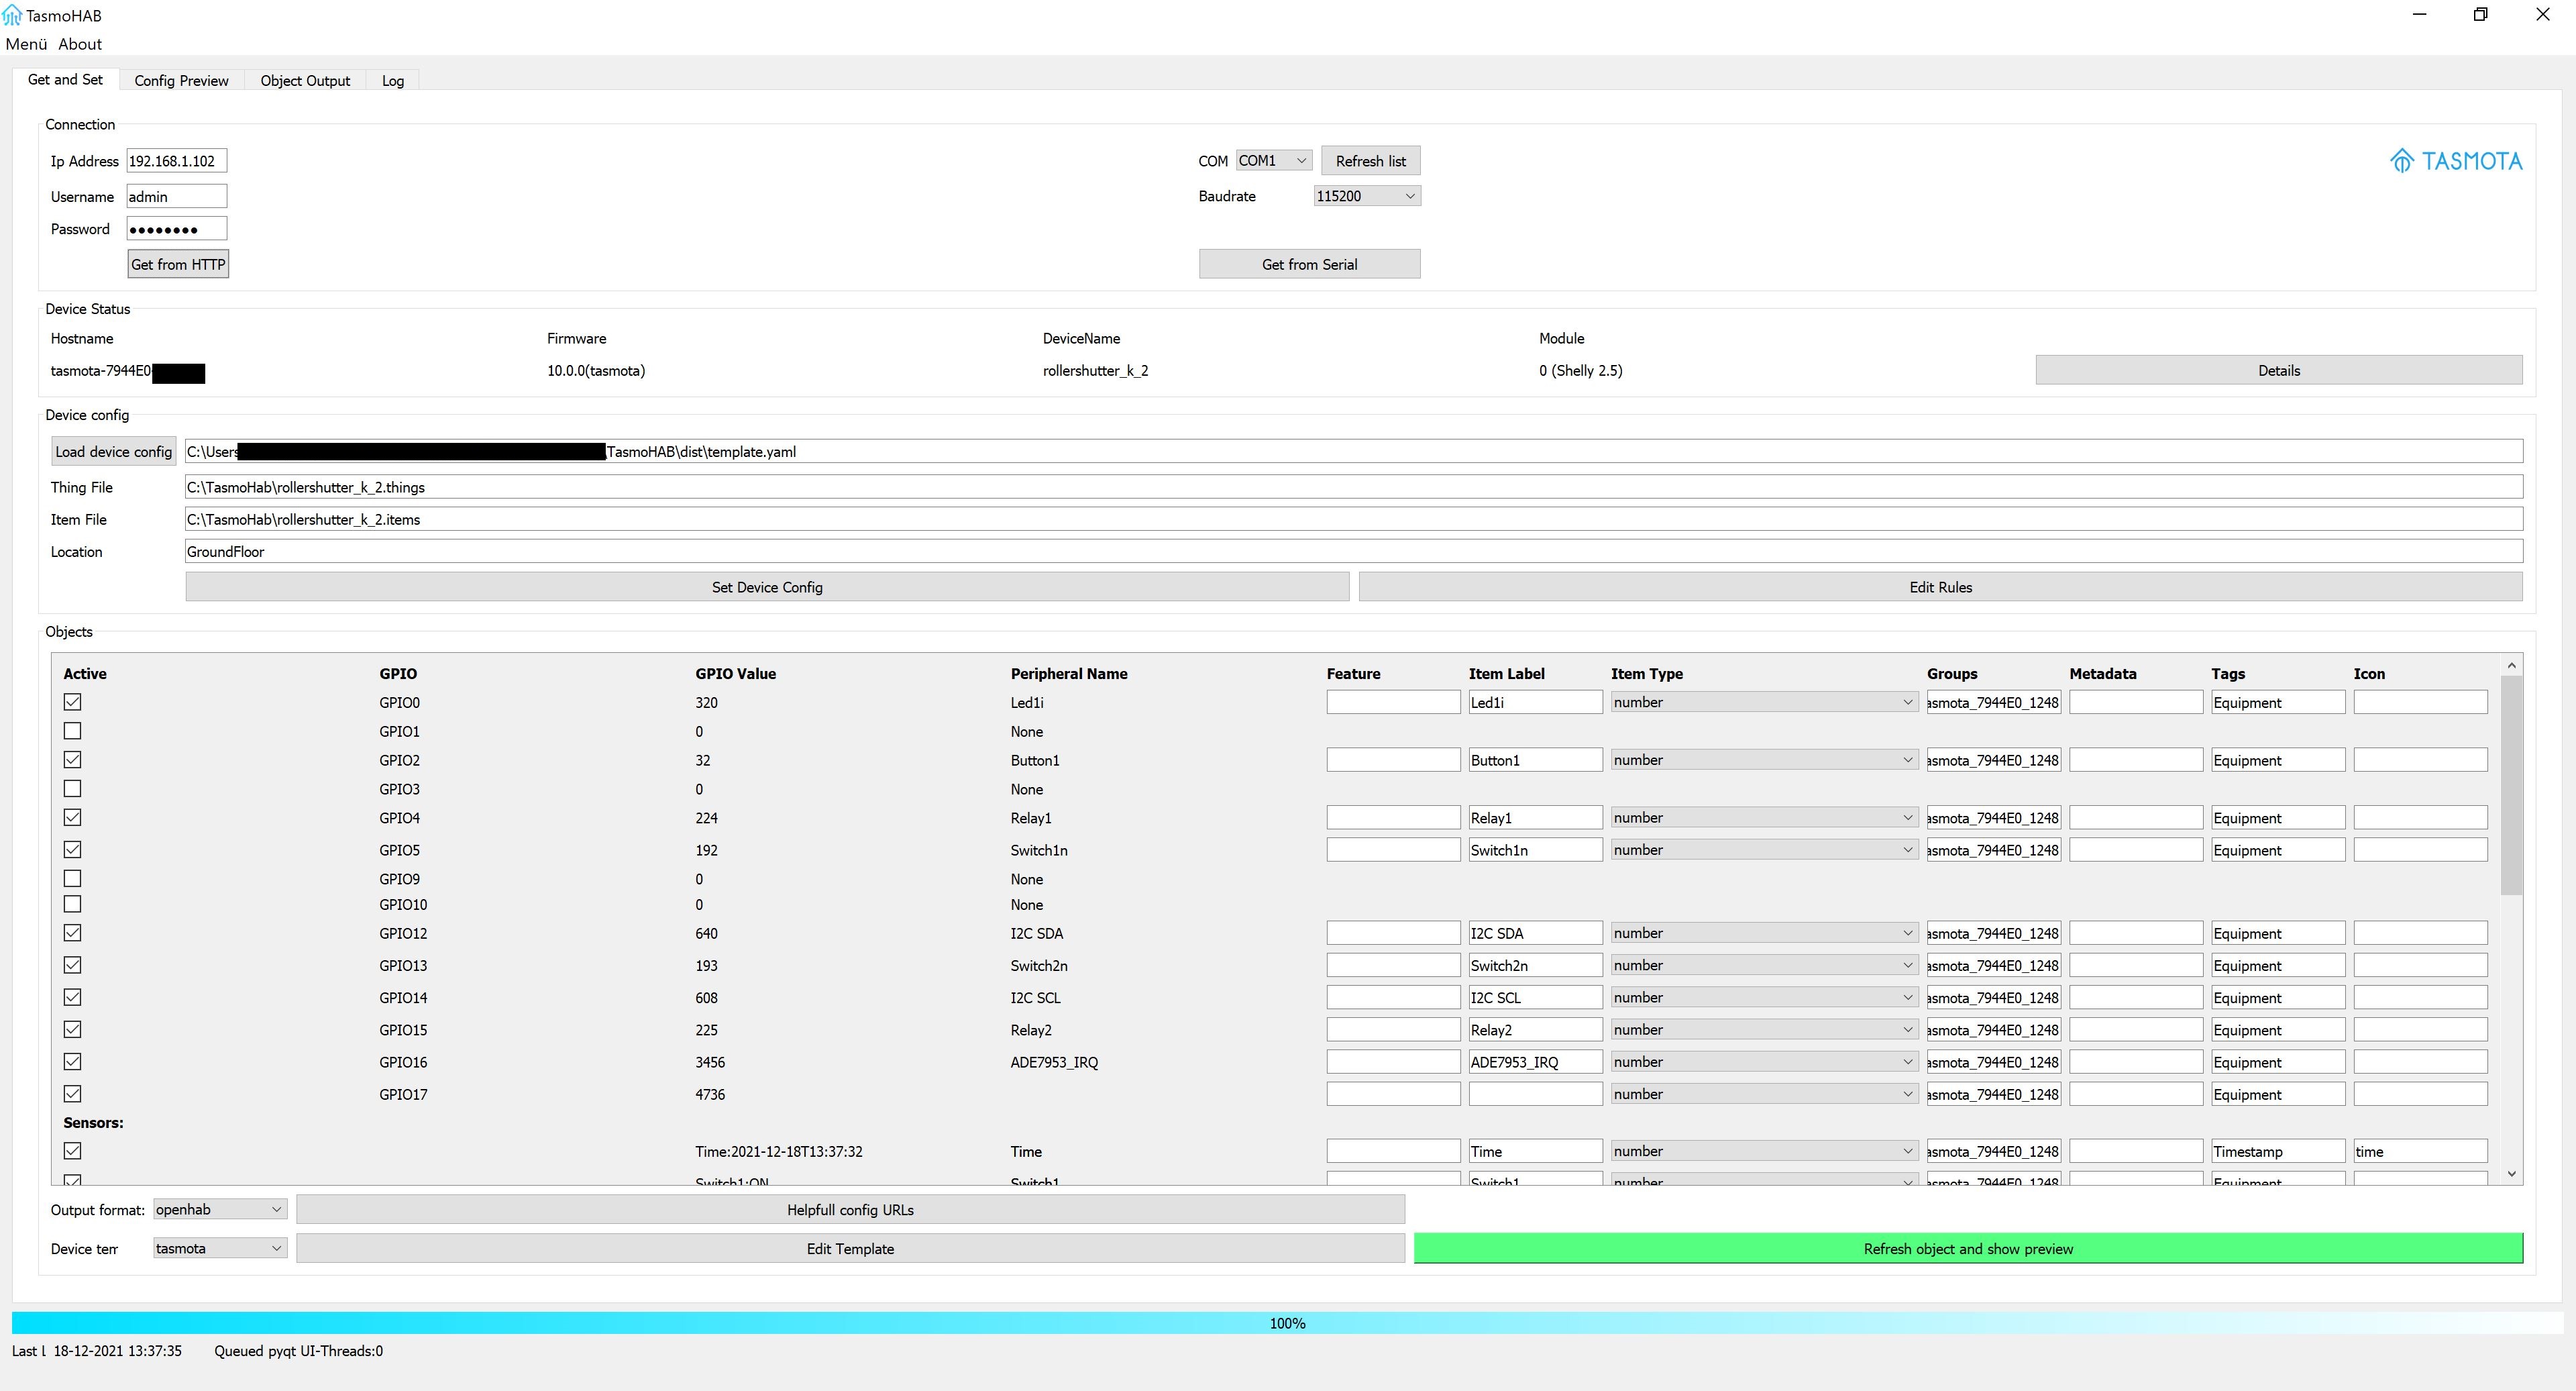
I was inspired by the project https://github.com/jimtng/ohgen to easily link a Tasmota device with OpenHab through a GUI. The programme uses the almost identical code of 'ohgen' to generate the things and items files. In the first step, all tasmota gpios of a device are queried and the peripherals are displayed in a table. Then the user can select or deselect individual actuators or sensors in the table. In the next step, a yaml config for 'ohgen' is generated, which contains the objects selected by the user. This config can still be edited here. In the last step, the things and items objects for openhab are displayed. These can either be copied or saved as files or saved via REST API. All read-in and processed data (sensors, device status, actuators, user settings, etc.) can be conveniently viewed in JSON format.
I would like to invite everyone to participate in the project to improve the tool!

The program uses
json_config_data = {}                       # data from YAML config file. later it holds all relevant data to generate a thing an item
json_dev_status = {}                        # all device data from device (http or serial)
json_tasmota_objects = {}                   # this object contains only gpio data (name, value and possible sensor) coming from tasmota device
json_tasmota_objects will be used later to fill the gui with content (gpios, sensors and actuators).
For example, here is the program flow when you click "Get from serial":

Show whole data (gpio information, openhab items, peripheral name, sensors, etc.) in a table/grid. The program differences between sensors and actuators. Sensors are objects, which are appear under 'StatusSNS' from the json response of the tasmota device. All other objects that do not appear there are actuators.
def add_ui_widgets(self):
Add the user specific widgets behind the corresponding object:
def add_ui_widgets_user(self, layout, row, label, peripheral_no='default'):
The values for every widget about an item comes from: [openhab.py](The values for every widget about an item comes from:)
All relevant data is stored in json_config_data[dict]. The function takes these data to generate things and items. It appends some additional data and then use ohgen.py to format the output data in a way that openhab can use it. Therefore ohgen needs a 'template of format'. You have to choose these template before you can generate any thing or output. These templates muste be named '*.tpl' and can be edited while runtime. The template have to be stored under ohgen/templates/test.tpl. The data is then shown in the last tab and can be saved to a thing and an item file.
The 'feature' line is not an openhab item or so. It is a special user-defined option for every item to distinguish it from normal item types (switch, number, ...). It is only used by the previously selected template. This can be used, for example, to control whether an element of the type 'Dimmer' has additional properties such as 'colourtemperature' or 'RGB'. This can be easily queried e.g. with an if-clause in the template.
The program uses all files with '*.tpl' extension in the directory 'ohgen/templates' for the output of the data. Here the format of the output can be predefined for each item type (Number, Contact, String, ...). The syntax rules for Jinja2 apply. If item types are omitted here, they are also ignored in the output. So e.g. several templates for different devices can be generated and used.
##Develop
Add a new widget 'QLineEdit' with 'objectname' = 'tasmota commandname' (f.e.: 'ssid1') to the QFrame with the objectname 'frame'. The function get this object (and its name) and put the name with its value to the backlog command.
Example in Qt Designer:
Add a new widget to 'gridLayout_cmds' layout.
Example in python script:
self.ssid1 = QtWidgets.QLineEdit(self.frame)
self.ssid1.setObjectName("ssid1")
self.gridLayout_cmds.addWidget(self.ssid1, 1, 1, 1, 1)          # caution with the position!
Theoretically, it is relatively easy to adapt the output format to other smarthome systems (e.g. homeassistant, etc.). Among other things, the file openhab.py, the function add_ui_openhab_widgets and of course the function gen_fin_objects must be adapted or replaced to adapt the output format. The third tab "Object output" can be filled with content e.g. at runtime to generate a different layout for other smarthome systems.
Go to Openhab-DEMO and validate your output. if erros exists, check your template first.
####PyQT5:
- python -m PyQt5.uic.pyuic tasmohabUI.ui -o tasmohabUI.py # for UI components
- pyrcc5 resource.qrc -o resource_rc.py # for resource items f.e. images (ressource.qrc) ####PyQT6:
- pyuic6 -x tasmohabUI.ui -o tasmohabUI.py
- pyuic6 -x dev_config.ui -o dev_config.py ####PyQt6 Designer:
- pyqt6-tools designer
- pyinstaller --onefile --windowed --icon=icon.ico --noconsole --clean --paths=...\TasmoHAB --pat hs=...\TasmoHAB\ohgen tasmohab.py
with virtualenv path:
- pyinstaller --onefile --windowed --icon=icon.ico --noconsole --clean --paths=...\PyCharm\venv\Lib\site-packages --paths=...\PyCharm\TasmoHAB --pat hs=...\PyCharm\TasmoHAB\ohgen tasmohab.py
For Debug (not windowed):
- pyinstaller --onefile --debug all --icon=icon.ico --clean --paths=...\PyCharm\venv\Lib\site-packages --paths=...\PyCharm\TasmoHAB --pat hs=...\PyCharm\TasmoHAB\ohgen tasmohab.py
- And then: ".\dist\tasmohab.exe"
after successfull build (uses last build config in spec file):
- pyinstaller tasmohab.spec
- tasmota device tested with firmware >8.3.1
- pip install -r requirements.txt
- Thanks to https://github.com/jimtng for this initial release of his work!